Showing posts with label food. Show all posts

Sunday, May 4, 2014

Cardamom & Pistachio Cookie Recipe

Cardamom & Pistachio Cookies
I fell in love with cardamom about two years ago as a delicious addition to homemade almond milk and that love (or slight obsession) has grown to include it in chia pudding, smoothies, the occasional sprinkle in my morning cup of coffee and now baking.  It was one of those situations where cardamom kept appearing in my life, first in an article I stumbled upon that said cardamom was actually easy to grow at home, then as an addition to homemade almond milk, and finally it appeared in beautiful green pods piled on top of each other in a large glass jar sitting on a top shelf in a local herb shop.  When I saw that glass jar it jolted my memory and I was hooked from that first deep inhalation of the strange but heady scent.

The cookie recipe was not my creation, but one that I sought out when I recently needed to make cookies for an upcoming Herb Guild Farmers Market sale I was asked to contribute to. I wanted something a little different and thought of making cookies with lemon balm but somehow I found myself searching for cardamom cookies and found these Cardamom & Pistachio Cookies.  Now I really want to try making Cardamom Chocolate Chip cookies as I think the cardamom would make a nice compliment to the chocolate, but that will be for another week.  These cookies reminded me of short bread, were simple to make and delicious!

My pistachios were roasted and salted so I cut the recommended amount of salt in half and I thought the cookies were just fine.  I refrigerated the dough roll over night and the first few cuts results in a crumbled cookie.  After allowing the dough to set for about 10 minutes on the counter the knife slid through clean and the dough still held its shape.  If you don't think your cookies are getting brown enough, just check the bottoms.  The dough is already a bit golden with the combination of the pistachios and butter so it is hard to tell how brown they are without checking the bottoms.  

What are your favorite herbs and spices?


Tuesday, February 5, 2013

Homemade Almond Milk


I have wanted to make homemade almond milk for a while now and finally took the leap a few weeks ago.  I have since made several batches and while I am still practicing with the amount of water used, flavorings, and the processing method, overall I am pleasantly satisfied with the results!

I love my coconut milk smoothies but wanted to change things up a bit and all of the store bought almond milk I have found seems to have a few more ingredients and additives that I am not interested in.  The method below is just filtered water and almonds along with spices or flavorings of your choice. 

After reading that soaked and sprouted nuts and seeds are better for you (you can read about the reasoning behind this here, and here)  I soaked my raw almonds for 24 hours before using them in the almond milk.

Homemade Almond Milk

You will need the following
  • 1 Cup of Soaked Almonds, rinsed and drained (Almonds were soaked for 24 hours in 4 cups of water and then drained, rinsed, and drained again)
  • 3-4 Cups of Filtered Water (Less water equals a richer and creamier milk)
  • Metal Strainer, Cheesecloth, or Nut Bag
  • Blender
  • Containers for storing finished product
Optional Flavorings
  • Vanilla Extract
  • Cocoa
  • Ground Cardamon
  • Cinnamon
  • Dates
  • Honey
  • Maple Syrup
Place almonds and filtered water in blender and process on high until well blended and frothy.  Place the strainer you are using over your storage container (I used a metal strainer and mason jars) and pour the almond milk into the strainer.  You will likely have to do this in batches as the by-product of the milk is almond meal which will build up in the strainer and need to be emptied.  Once all of the milk has been strained, you can add the milk back to your cleaned blender and add flavoring of your choice.  Experiment with this and see what you like.  My favorite blend so far is Almond Milk with Vanilla, Cinnamon, and Cardamon (V.C.C).  I used a pinch of cinnamon, a pinch of cardamon and a few drops of vanilla per cup of finished milk.  I would advise to start off with very small amounts of flavoring as to not take away from the great taste of the milk itself.  The first batch I made I used honey and did not like how sweet the milk tasted by itself but loved it in smoothies.  The milk stores in the refrigerator for up to 4 days. The milk will separate after mixing and should be gently shaken before serving.  I also froze a few batches in small jars with great success.


Soaked almonds prior to draining and rinsing

Almonds with and without skins
When I made almond milk for the first time, I made one batch with skins and one batch without skins.  I could not tell any difference in taste so I have made all other batches with skins on.

Metal Strainer and Mason Jar

Almond Meal by-product emptied from strainer

Final Product-Rich and Frothy Almond Milk

Wednesday, October 10, 2012

Day Ten: Favorite Things-Coconut

Mmmmmmm...COCONUT...I love the way it smells and the way it tastes.

I have loved coconut since I was a little girl and my grandmother would share with me her stash of Brach's Neapolitan Coconut candies, which I just found out have been discontinued. 

One of my favorite perfumes, Ooh-La Hula, that had the perfect mixture of coconut, jasmine and neroli was also discontinued.

Evidently not everyone shares the same love for coconut that I do. 

Here is how I enjoy Coconut products:
  • Coconut milk (I usually buy canned but have also made it from whole coconuts and frozen it)
    •  In my daily Coconut Milk-Blueberry-Banana-Almond Butter Smoothie 
    •  In place of water when cooking rice for a little sweetness and added layer of flavor when adding rice to stir fry.
  • Coconut Oil (Unrefined)
    • As the oil of choice for roasted sweet potatoes
    • Melted and rubbed over a whole chicken for roasting
    • As a moisturizer for skin
    • In my bath fizzies
  • Shredded Coconut (Unsweetened)
    • Mixed with sliced bananas, thawed berries, almond butter, and raw cacao
    • Over greek yogurt with cinnamon and walnuts

Coconut Milk-Blueberry-Banana-Almond Butter Smoothie
 
8-10 Ounces of Coconut Milk
8-10 Ounces Frozen Blueberries
1 Whole Banana
1 Heaping Tablespoon of Almond Butter
1 Tablespoon Ground Flax Seed
1 Tablespoon Wheat Germ
1 Tablespoon Chia Seeds (Optional-When I add these I soak them in coconut milk for 15 minutes)

Add all ingredients to your blender and mix until smooth and creamy.  Enjoy!

Warning...the blueberries may leave little specks in between your teeth from the shredded skins and seeds.  Check your teeth before leaving the house or you may get some funny looks. 


Sunday, October 7, 2012

Day Seven-Favorite Things-Cooking

Chicken Vegetable Soup Ready for the Freezer
I really enjoy cooking; creating a meal, knowing what is in my food, feeding others, and trying new recipes.  It hasn't always been this way and for (too) many years we ate out and existed on fast food and frozen stuff.  I cooked every other weekend or so or when we had company but there was nothing regular about it.  Of course our schedules were  not regular for a long time either with Alan in night classes and me working 10+ hour days five days a week. 

So when I took a break from working for a paycheck I decided cooking would help us be healthier and save money.  After scouring a bunch of blogs I discovered the best thing to do was to develop a meal plan for every night (some even have lunch and dinner plans) and to build your grocery list from there.  It did not take me long to get the hang of this and to really appreciate the plan.  Almost two years later I still make a plan and often feel lost and make not so good choices when I don't have one ready.  I just check out other meal planning blogs and recipes and a few sites and incorporate other tried and true favorites and make a list of 5-7 meals.  Then each morning I think about what we are going to have based on how long it takes to make a recipe and what we have going on that week.

Here are a few of my favorite sites for meal plans and recipes:

  • She has great meal plans, recipe and cook book reviews and lovely photos.
  • They have simple and seasonal recipes as well as quite a few gluten free ones too.
  • This site also has simple and seasonal recipes as well as meal plans.
  • This is a great site for Paleo recipes which also happen to be gluten free.
  • I just discovered this site recently and she shares her recipes and has meal plans too.
 
Here is a typical meal plan for our house for the week with links for a few  of the recipes (which will link up with other sites I use):


Stir-Fry with Rice, Quinoa, or Cauliflower Rice


Salmon Filet's with Roasted Sweet Potatoes and Spicy Cilantro Slaw


Roast Chicken, Green beans, Roasted Potatoes


Mushroom and Tomato Sauce over Spaghetti Squash


Meat Loaf, Cauliflower Rice, Slaw


Tacos, Green Rice, Spicy Black Beans


How do you plan your meals for the week?  Please feel free to share your own favorite recipes, ideas, or links to meal planning ideas.

Thursday, October 4, 2012

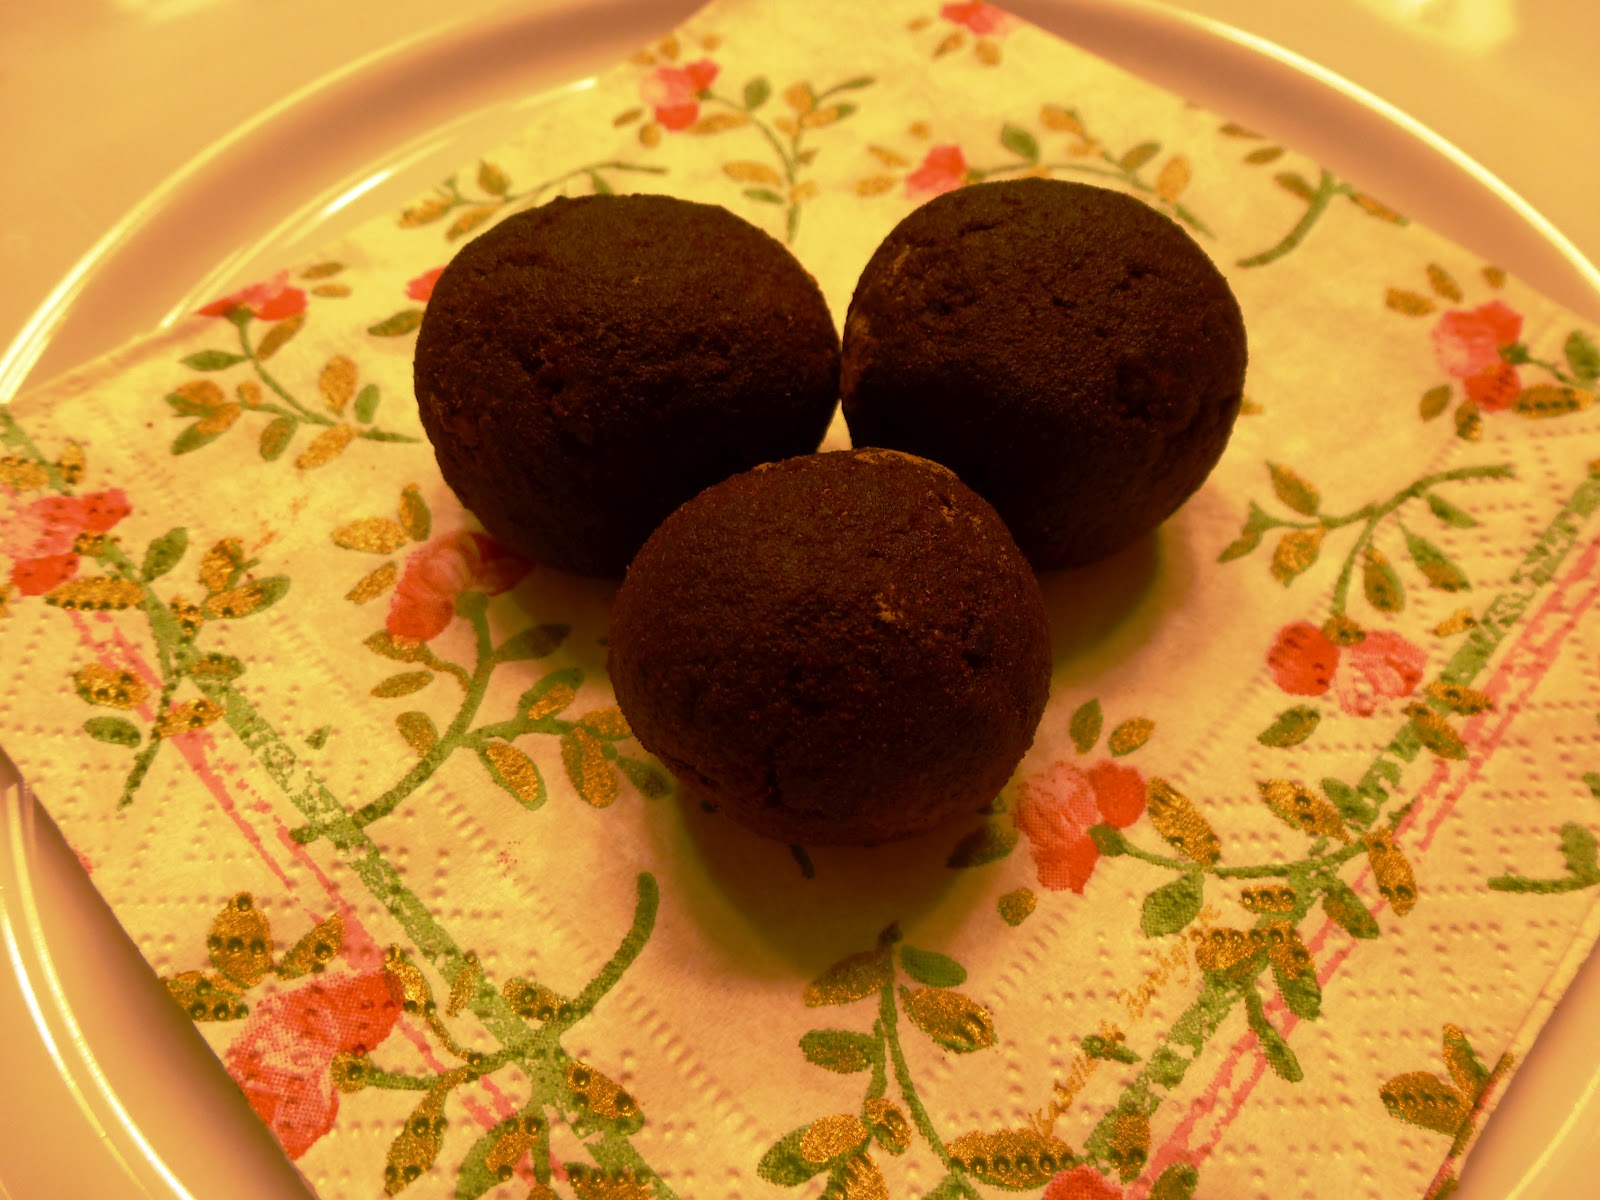
Day Four: Favorite Things-Cinnamon Dusted Truffles-AKA Energy Balls

Cinnamon Dusted Truffles
Around here I refer to these as energy balls but truffle comes closer to the decadence of these little treats.  Packed with protein and good fats, these are my go to snack. Plus the Cacao is packed with magnesium and iron.  If you are new to Cacao you can find it at places like Whole Foods, the Healthy Home Market if you live in Charlotte, NC, or likely at your local health food type store.  The recipe below is my adaptation from a recipe I found two years ago on the blog The Byrdfeeder.

I hope you enjoy!!

Cinnamon Dusted Truffles
Yield:  35-40 Truffles

2 cups chopped raw walnuts
1/2 cup raw cacao nibs
1 cup organic raisins
4 tablespoons Almond Butter (salted or unsalted)
1 pinch fine sea salt


2-3 tablespoons of cinnamon (for coating)

Mix all the ingredients together in a food processor.  I don’t have a food processor myself so I mix the nuts, raisins, cacao and sea salt in small batches in the blender and then hand adding in the almond butter in a medium bowl.

After combining all the ingredients, I then hand roll the mixture into quarter sized balls and place on a baking sheet covered in wax paper.  Once all the truffles have been rolled I fill a small ramekin with the 2-3 tablespoons of cinnamon and roll one truffle at a time, gentling shaking the ramekin back and forth causing the truffle to roll round and round and coat itself in cinnamon.  The truffles will begin to darken to a nice espresso color as the oils from the truffle combines with the cinnamon.
 
Place all truffles back on the wax paper lined cookie sheet and place in the freezer for about 30 minutes. 

I then divide the truffles into two containers; one for the refrigerator and one for the freezer.  These keep in the refrigerator for approximately 2 weeks and in the freezer for 6 months, although to be honest I doubt they will hang around your house that long!
If the mix is to wet you can add more nuts to get a drier consistency.

If the mix is too dry you can add more almond butter.

If you are not fond of cinnamon, cocoa powder or fine shredded coconut are also wonder coating choices.

Based on the nutritional data on the packages of ingredients I used, I broke down the nutritional information below.

Food
Calories
Fat
Carbs
Protein
Sugars
Walnuts
1600
160
24
40
0
Raisins
1040
0
248
8
232
Cacao
520
48
40
16
0
Almond Butter
760
68
24
32
8
Total
3920
276
336
96
240
# Energy Balls
33
33
33
33
33
Nutrition
Per Each
119
8
10
3
7

In-Process Photos
Ingredients
 
Before Processing
 
Ready for the Cinnamon

Friday, September 30, 2011

A Recipe

Poblano and Serrano Peppers and the last of the Mexican Miniature Tomatoes


This week while I was mowing the yard these Poblano Peppers from our little garden caught my eye.  I kept waiting for them to get bigger but I think this may be their correct size.  I fretted that I may have waited to long  to pick them but thankfully they were just right. Come August I really lose my enthusiasm for the garden and everything that makes it is valiant and resilient in the truest since.  I have suckers on my pitiful tomato vines and overgrown okra the size of cucumbers.  Thankfully the chives and thyme take care of themselves.

This is my first time growing Poblano Peppers so I was eager to find a recipe to use them in. The thought of stuffing them full of cheese was very appealing (I love cheese) but I wanted something a little different than stuffed peppers.  I found a wonderful recipe and it was so easy to make too-Green Rice!  When you first taste the rice there is almost a smokiness from the peppers that suggests heat is to come but it never does.  In fact there is no burning sensation at all just yumminess and a desire to have another forkful and then another.  Feel free to add a little cheese on top too!  :)  This rice is the most lovely shade of green and makes a wonderful side dish or main course.  We had fish tacos and black beans with ours.


1 2/3 cups chicken broth or water
2 fresh poblano chiles, stems and seeds removed, and roughly chopped
12 sprigs cilantro, plus extra for garnish
Salt, about 1/2 teaspoon if using salted broth, 1 teaspoon if using unsalted or water
1 tablespoon vegetable or olive oil
1 cup rice, preferably medium grain
1 small white onion, cut into 1/4-inch dice
5 garlic cloves, peeled and finely chopped

The flavoring: In a 2-quart saucepan, combine the broth and chiles, bring to a boil, then partially cover and simmer gently over medium to medium-low heat for about 10 minutes, until the chiles are very soft. Pour the chile mixture into a food processor, add the cilantro (stems and all), and process to a smooth puree. Press through a medium-mesh strainer into a bowl and stir in the salt.

The rice: Wipe the pan clean, add the oil and heat over medium. Add the rice and onion, and cook, stirring regularly, until the rice is chalky looking and the onion is soft, about 5 minutes. Stir in the garlic and cook a minute longer.

Add the warm (or reheated) chile liquid to the hot rice pan, stir once, scrape down any rice kernels clinging to the side of the pan, cover, and cook over medium-low heat for 15 minutes. Uncover and check a grain of rice: It should be nearly cooked through. If the rice is just about ready, turn off the heat, re-cover and let stand for 5 to 10 minutes longer to complete the cooking. If the rice seems far from done, continue cooking for 5 minutes or so, retest, then turn off the heat and let stand a few minutes longer. Fluff with a fork, scoop into a warm serving dish, decorate with cilantro sprigs and it's ready to serve.

Advance preparation: The rice can be made several days ahead; turn out the fluffed rice onto a baking sheet to cool, transfer to a storage container, then cover and refrigerate. Reheat the rice in a steamer basket set over boiling water.

Variations and improvisations: An obvious variation is to use 3 or 4 long green (Anaheim) chiles, or to mix poblanos and long greens with hotter chiles like jalapeño, manzano or habanero.

Monday, August 1, 2011

Blueberry Picking

Saturday I had the delight of meeting up with an old friend for a quick breakfast and three hours of blueberry picking.  I love that these blueberry fields are off the beaten path and that the honor system can still be found here with an attention getting yellow lock box the only technology I needed to interact with. 

Honor Box
The blueberries were found in a meadow surrounded by woods and they grew on these tall tree-like bushes. 

Entering the meadow, the blueberries are off to the left
The bushes were heavy with berries of each life stage from tiny green buds to medium cranberry like berries and all the way up to button sized berries full of sweetness and smiles.


I actually picked more berries than I ate (2 gallons) but made up for that later when I got home and went about cleaning and drying them. The berries are the most beautiful shade of blue-purple-black depending on the light and remind me of what I imagine octopus ink would look like.

Just-washed blueberries

Saturday, July 30, 2011

Lima Bean Salad Recipe

I have been craving a fresh and new cold bean salad since I tasted the Corona Bean and Shrimp Salad at Cafe Fiorello in New York.  Since I had a friend coming over for lunch on Friday I decided to test a recipe that I found for Butter Bean Salad and changed the beans to these giant lima beans we have at our grocery store and also added a generous amount of freshly chopped Italian Flat Leaf Parsley.  Oh it is so good that I thought I would share here. 

I imagine this recipe could be changed to suit different taste's and how you could add shrimp if you like or even serve it warm in the winter, but for these 98 degree days, cold is perfect for me.  My friend loved it and asked for the recipe and my sister-in-law had two servings of it and raved about it.  I hope you like it too! 

PS...I served it with fresh corn on the cob that my friend brought and fresh out of the oven tomato pie that I wrote about before.

Butter Bean Salad Recipe courtesy Rachael Ray
  • 2 cans butter beans, rinsed and drained, 15 ounces each (or Butter Beans-that is what I used)
  • 1/2 red bell pepper, diced
  • 1/2 green bell pepper, diced
  • 1/2 red onion, chopped
  • 2 cloves garlic, peeled and minced
  • 1 teaspoon ground cumin, 1/3 palm full
  • 2 tablespoons extra virgin olive oil
  • 1 large lemon, juiced
  • Coarse salt and freshly ground black pepper
  • 1 Palm full of Italian Fat Leaf Parsley (my addition)

Directions

Combine all ingredients in a medium bowl. Toss to coat beans and vegetables evenly in dressing.

Now I am off to pick blueberries with another friend. Have a Delightful Day!

Tuesday, July 12, 2011

A Recipe

Ever since tasting a wonderful tomato pie several years ago at Mozelle's, a local restaurant, I have been wanting to try to make one of my own.  With tomatoes coming in now and another tomato lover inviting me to the beach, I thought our beach trip would be the perfect opportunity to try out a recipe I found.  I mean tomatoes and cheese in a pie...what could go wrong with that?  Nothing!  It was heavenly. 

There are not any pictures of the pie that we made as I still have not quite got the hang of taking pictures of food that looks good. I did however take a picture of the beautiful tomatoes that were used to create the pie, and the link to the recipe shows a picture that looks just like the one we made.  It is one rich pie and could be served as a hearty appetizer or as a meal with a small salad.   I hope you enjoy it!

PS....We used a frozen store bought crust instead of the homemade one listed and used extra cheddar and monterey jack cheeses in place of the fontina cheese.

Heirloom Tomato Pie With Black Pepper Parmesan Crust
serves 6

for the crust
1 ½ cups all-purpose flour
1 tsp salt
2 tbsp fresh grated parmesan
2 tsp coarsely ground black pepper
10 tbsp cold unsalted butter, cut into small chunks
1/3 cup ice water

for the filling
5 heirloom tomatoes, sliced, salted and well drained*
½ cup mayonnaise
½ cup sharp cheddar cheese, grated
½ cup monterey jack cheese, grated
¼ cup fontina, grated
10-12 basil leaves, chopped
1 bunch of chives, chopped
salt and pepper

*To avoid a case of pie soggy bottom, the tomatoes need to drain on a metal rack for about an hour.

Preheat the oven to 350 degrees. To make the crust, combine the flour, salt, parmesan and black pepper in a food processor. Pulse a few times to combine. Add the butter, and pulse until the mixture’s largest chunks are about pea sized. With the food processor running, slowly drizzle the ice water through the feed tube until the dough starts to form a single ball. Gather the dough together and place on the center of a piece of plastic wrap. Cover and shape into a small disc. Chill for at least 30 minutes in the fridge. Remove dough from the fridge, and allow to sit on the counter for about 15 minutes. Flour your rolling surface, and gently roll the dough out into a 12-inch circle. Drape the dough over the rolling pin and transfer to a 9-inch pie dish. Trim the edges and pinch into a decorative design. With a fork, poke holes in the bottom of the entire crust. Place a piece of parchment paper into the center of the pie dish with the edges gathered so as to not touch the edges of the crust. Place enough dried beans or pie weights onto the foil to just fill the bottom. Bake the pie crust for 15 minutes, remove paper and pie weights and allow to cool.

To assemble the pie, mix the mayonnaise, cheddar and Monterey Jack cheeses in a small bowl. Season with salt and pepper. Layer the tomato slices, basil and chives to the top of the cooled pie crust. Spread the cheese mixture on top of the tomatoes. Sprinkle the fontina on top, and bake for 30 minutes until the cheese has completely melted. Allow the pie to cool slightly before cutting.

Wednesday, February 16, 2011

A Few of My Favorite Foods

Since December I have been focusing on eating healthier and more balanced meals.  Some days the amount of chocolate I consume versus vegetables is not balanced, but some days just call for more chocolate than others. 

Two of my favorite and go-to again and again foods are Flat Bread and Plain Greek Yogurt.  These are such simple items, but the combinations for how I can and do use these are endless.  I use the flat bread for wraps, pizza, burritos, enchiladas and bread crumbs.  My favorite use for flat bread though has got to be pizza.  It is so quick to grab the flat bread and just about anything you have in the refrigerator and "POOF" you have a delicious, healthy and quick meal.  Today I had veggie pizza with an olive oil base, fresh mushroom and red pepper slices, fresh cilantro leaves, feta cheese, and topped with a little shredded mozzarella and dried oregano.  The feta cheese gives it a nice bite. 

Pre Oven
Post Oven (see how it fills the plate-a hearty meal)
My husband's favorite pizza is our take on Buffalo Chicken.

Buffalo Chicken Pizza
1 piece of flat bread
1 tablespoon of Olive Oil (you can use more if you like)
1/4 Cup Cooked and Shredded Chicken (I use roasted or rotisserie chicken)
3 Large Fresh Sliced Mushrooms
About 10 leaves of fresh Cilantro chopped or whole
1/2 teaspoon of Dried Oregano
Buffalo Wing Sauce Drizzled (approximately 1 tablespoon/we use Texas Pete)
2 tablespoons Feta Cheese
1/4 cup Mozzarella Cheese

Measure 1 tablespoon of olive oil and spread all over the flat bread with the backside of the spoon.
Layer on ingredients in order listed.
Drizzle with wing sauce then top with cheese. 
I only bake this pizza for about 5 minutes at 350 and then I turn on the boiler (low) until the cheese bubbles and turns slightly brown.

 I have included suggested amounts for the ingredients but add or subtract as your taste buds dictate. Also feel free to add any other ingredients you have on hand or simply just love. 

The other food I constantly find myself using is Plain Greek Yogurt.  It does not stay plain long in my house, but that is where it all begins. You can dress it up with nuts and fruit for breakfast or use it as a substitute for mayonnaise, salad dressing, and as a topping or dip for fish/chicken/meat dishes.  I mix in Chalulu hot sauce with greek yogurt for a hot and spicy topping for black beans and tacos.  For roast beef I mix greek yogurt and hot and spicy mustard together as side sauce or for sandwiches. Once a week I make a batch of my take on the famous greek tzatziki sauce.  This is a refreshing and tangy sauce for chicken, fish and veggie dishes or sandwiches and I use it almost every day.

Yogurt Cilantro Sauce
1 cup Plain Yogurt 
2 Tablespoons of honey (optional but I love it)
1 large cucumber peeled and chopped fine (you can de-seed but I don't bother)
Cilantro chopped or cut fine with scissors (I use about 1/4 of a bunch)
1-2 cloves of garlic finely chopped
3 dashes of dill (or more for your taste)
Salt and Pepper to taste (just a dash of salt as this is flavorful without it)
2 Tablespoon of Lime Juice (you can also use lemon if that is what you have on hand-I just prefer lime juice)

Mix all of the ingredients together and refrigerate for up to 7 days.  This tastes great when just made but tastes even better about an hour after the ingredients have had a chance to blend together.

What are your favorite go-to foods or food finds you just can't live without?