Showing posts with label cinnamon. Show all posts

Wednesday, January 1, 2014

Happy New Year & a Recipe

Homemade Elderberry Syrup
It is the first day of 2014 and I feel hopeful anticipation for the year ahead. I don't know why but I like the clear line of a new year and a fresh start. Each day we have this opportunity, the chance to begin again, to breathe in the possibility, to bear witness to life unfolding around us and the life unfolding within us but on New Years day it feels even more significant to me.

Today I began my day at my work table in our shared office/guest bedroom with a cup of coffee and my journal.  I wrote about purpose, what I think mine is and how to live it in this coming year.  Part of that purpose is healing, myself and others, and part of that purpose is sharing.  The sharing part is often hard for me as I second guess myself and concern myself that others will say "on what authority is she saying this". The truth is most of what I share is universal knowledge though, shared as seen through my own experience. In alignment with my desire to live my purpose, and to heal and to share, today I am sharing a recipe for Elderberry Syrup.

I learned about Elderberries last year when I attended one of several local herb classes.  The owner of the farm and teacher of the class mentioned making homemade elderberry syrup for the cold and flu season. The elderberry comes from a small tree/bush and is well known in the herbal community for its ability to boost the immune system preventing and shortening the length of the flue and colds. They are a rich source of bioflavonoids and antioxidants as well as the nutrients potassium, beta carotene, calcium, phosphorus and vitamin C.  

It is so funny how once you hear about something of interest, all of a sudden you see and hear about it all around you. I soon found dried elderberries in my favorite local health/grocery store when looking in their bulk section and even purchased a syrup from this store as well when I was sick and looking for homeopathic solutions.

As Alan has been fighting a cold for 2+ weeks and I felt the symptoms beginning myself,  I decided to try making the syrup myself using a recipe from Mountain Rose Herbs. I cut the recipe in half as I purchased the elderberries locally and the store I shop at was running low. After seeing a display of organic elderberry syrup for $21, buying the small amount of dried berries and cutting the recipe in half was a no-brainer.  I was low on honey and bought a huge jar for $16 but the organic dried elderberries, cloves, and cinnamon sticks were less than $2.00 total. Even if you don't already have honey on hand this is still a very economical recipe as it produces a lot of syrup (3.5 cups).  Some people really love the flavor of the syrup and add it to everything from pancakes to oatmeal but I find it a bit medicinal and am still getting used to it. I think next time I may omit the cloves.  Although the cloves and cinnamon may be used as a natural preservative so I need to do a bit more research first.

Ginger, Raw Honey, Elderberries, Cinnamon, and Cloves

Here is the recipe as found on Mountain Rose Herbs site.  As I mentioned, I cut the recipe in half and it still produced approximately 1.5 cups of syrup.

Please note that elderberry is not safe for pregnant or nursing women, that you should do your own research before taking any types of herbs to ensure that they do not interact with any conditions you have or medications you may take and that honey is not appropriate for children under the age of 2 years old.

Elderberry Syrup Recipe


- 1 cup fresh or 1/2 cup dried organic Elderberries (harvest blue or black, avoid poisonous reds)
- 3 cups water
- 1 cup raw local honey
- 1 organic Cinnamon stick, 3 organic Cloves, and organic Ginger (optional)
Place berries, water, and spices in a saucepan. Bring to a boil, reduce heat, and simmer for 30 minutes. Smash the berries to release remaining juice and strain the mixture. (discard cooked berries/cloves/ginger/cinnamon) Allow liquid to cool and stir in honey. Will last for 2-3 months stored in the fridge.

Hope you have a Happy and Healthy 2014!


Tuesday, February 5, 2013

Homemade Almond Milk


I have wanted to make homemade almond milk for a while now and finally took the leap a few weeks ago.  I have since made several batches and while I am still practicing with the amount of water used, flavorings, and the processing method, overall I am pleasantly satisfied with the results!

I love my coconut milk smoothies but wanted to change things up a bit and all of the store bought almond milk I have found seems to have a few more ingredients and additives that I am not interested in.  The method below is just filtered water and almonds along with spices or flavorings of your choice. 

After reading that soaked and sprouted nuts and seeds are better for you (you can read about the reasoning behind this here, and here)  I soaked my raw almonds for 24 hours before using them in the almond milk.

Homemade Almond Milk

You will need the following
  • 1 Cup of Soaked Almonds, rinsed and drained (Almonds were soaked for 24 hours in 4 cups of water and then drained, rinsed, and drained again)
  • 3-4 Cups of Filtered Water (Less water equals a richer and creamier milk)
  • Metal Strainer, Cheesecloth, or Nut Bag
  • Blender
  • Containers for storing finished product
Optional Flavorings
  • Vanilla Extract
  • Cocoa
  • Ground Cardamon
  • Cinnamon
  • Dates
  • Honey
  • Maple Syrup
Place almonds and filtered water in blender and process on high until well blended and frothy.  Place the strainer you are using over your storage container (I used a metal strainer and mason jars) and pour the almond milk into the strainer.  You will likely have to do this in batches as the by-product of the milk is almond meal which will build up in the strainer and need to be emptied.  Once all of the milk has been strained, you can add the milk back to your cleaned blender and add flavoring of your choice.  Experiment with this and see what you like.  My favorite blend so far is Almond Milk with Vanilla, Cinnamon, and Cardamon (V.C.C).  I used a pinch of cinnamon, a pinch of cardamon and a few drops of vanilla per cup of finished milk.  I would advise to start off with very small amounts of flavoring as to not take away from the great taste of the milk itself.  The first batch I made I used honey and did not like how sweet the milk tasted by itself but loved it in smoothies.  The milk stores in the refrigerator for up to 4 days. The milk will separate after mixing and should be gently shaken before serving.  I also froze a few batches in small jars with great success.


Soaked almonds prior to draining and rinsing

Almonds with and without skins
When I made almond milk for the first time, I made one batch with skins and one batch without skins.  I could not tell any difference in taste so I have made all other batches with skins on.

Metal Strainer and Mason Jar

Almond Meal by-product emptied from strainer

Final Product-Rich and Frothy Almond Milk

Wednesday, October 10, 2012

Day Ten: Favorite Things-Coconut

Mmmmmmm...COCONUT...I love the way it smells and the way it tastes.

I have loved coconut since I was a little girl and my grandmother would share with me her stash of Brach's Neapolitan Coconut candies, which I just found out have been discontinued. 

One of my favorite perfumes, Ooh-La Hula, that had the perfect mixture of coconut, jasmine and neroli was also discontinued.

Evidently not everyone shares the same love for coconut that I do. 

Here is how I enjoy Coconut products:
  • Coconut milk (I usually buy canned but have also made it from whole coconuts and frozen it)
    •  In my daily Coconut Milk-Blueberry-Banana-Almond Butter Smoothie 
    •  In place of water when cooking rice for a little sweetness and added layer of flavor when adding rice to stir fry.
  • Coconut Oil (Unrefined)
    • As the oil of choice for roasted sweet potatoes
    • Melted and rubbed over a whole chicken for roasting
    • As a moisturizer for skin
    • In my bath fizzies
  • Shredded Coconut (Unsweetened)
    • Mixed with sliced bananas, thawed berries, almond butter, and raw cacao
    • Over greek yogurt with cinnamon and walnuts

Coconut Milk-Blueberry-Banana-Almond Butter Smoothie
 
8-10 Ounces of Coconut Milk
8-10 Ounces Frozen Blueberries
1 Whole Banana
1 Heaping Tablespoon of Almond Butter
1 Tablespoon Ground Flax Seed
1 Tablespoon Wheat Germ
1 Tablespoon Chia Seeds (Optional-When I add these I soak them in coconut milk for 15 minutes)

Add all ingredients to your blender and mix until smooth and creamy.  Enjoy!

Warning...the blueberries may leave little specks in between your teeth from the shredded skins and seeds.  Check your teeth before leaving the house or you may get some funny looks. 


Thursday, October 4, 2012

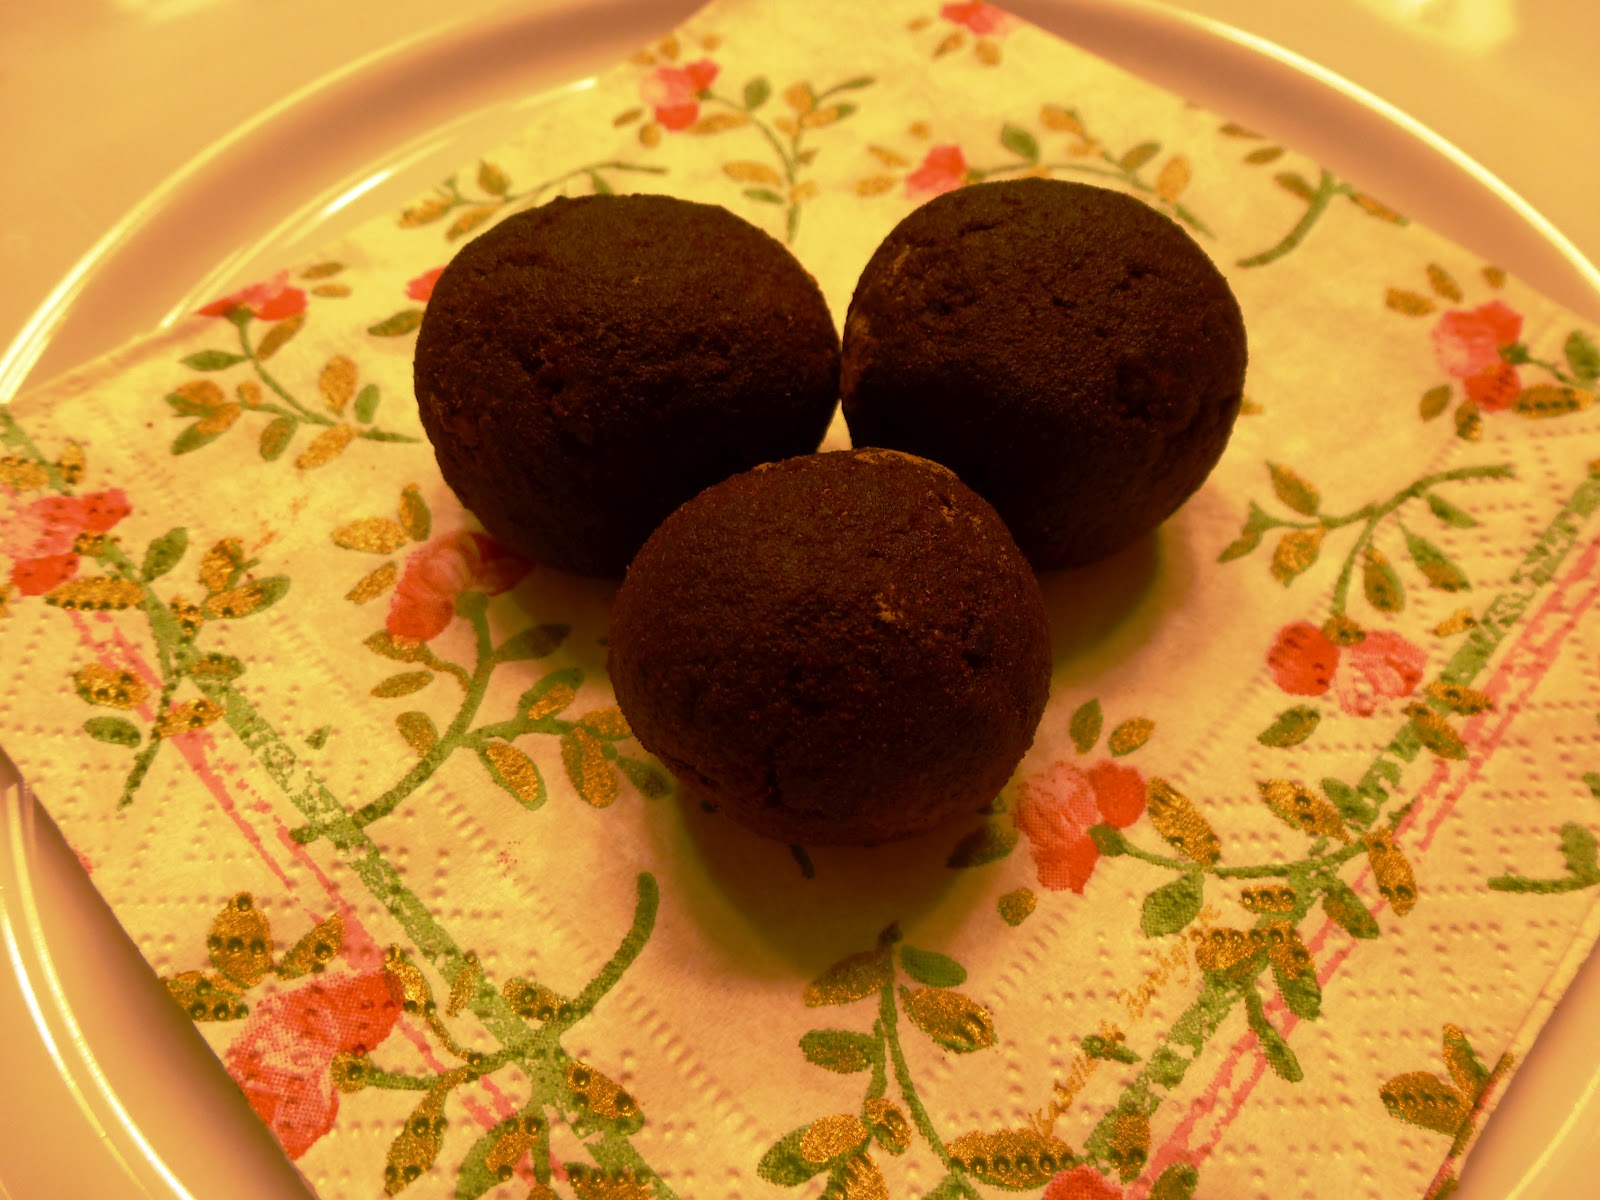
Day Four: Favorite Things-Cinnamon Dusted Truffles-AKA Energy Balls

Cinnamon Dusted Truffles
Around here I refer to these as energy balls but truffle comes closer to the decadence of these little treats.  Packed with protein and good fats, these are my go to snack. Plus the Cacao is packed with magnesium and iron.  If you are new to Cacao you can find it at places like Whole Foods, the Healthy Home Market if you live in Charlotte, NC, or likely at your local health food type store.  The recipe below is my adaptation from a recipe I found two years ago on the blog The Byrdfeeder.

I hope you enjoy!!

Cinnamon Dusted Truffles
Yield:  35-40 Truffles

2 cups chopped raw walnuts
1/2 cup raw cacao nibs
1 cup organic raisins
4 tablespoons Almond Butter (salted or unsalted)
1 pinch fine sea salt


2-3 tablespoons of cinnamon (for coating)

Mix all the ingredients together in a food processor.  I don’t have a food processor myself so I mix the nuts, raisins, cacao and sea salt in small batches in the blender and then hand adding in the almond butter in a medium bowl.

After combining all the ingredients, I then hand roll the mixture into quarter sized balls and place on a baking sheet covered in wax paper.  Once all the truffles have been rolled I fill a small ramekin with the 2-3 tablespoons of cinnamon and roll one truffle at a time, gentling shaking the ramekin back and forth causing the truffle to roll round and round and coat itself in cinnamon.  The truffles will begin to darken to a nice espresso color as the oils from the truffle combines with the cinnamon.
 
Place all truffles back on the wax paper lined cookie sheet and place in the freezer for about 30 minutes. 

I then divide the truffles into two containers; one for the refrigerator and one for the freezer.  These keep in the refrigerator for approximately 2 weeks and in the freezer for 6 months, although to be honest I doubt they will hang around your house that long!
If the mix is to wet you can add more nuts to get a drier consistency.

If the mix is too dry you can add more almond butter.

If you are not fond of cinnamon, cocoa powder or fine shredded coconut are also wonder coating choices.

Based on the nutritional data on the packages of ingredients I used, I broke down the nutritional information below.

Food
Calories
Fat
Carbs
Protein
Sugars
Walnuts
1600
160
24
40
0
Raisins
1040
0
248
8
232
Cacao
520
48
40
16
0
Almond Butter
760
68
24
32
8
Total
3920
276
336
96
240
# Energy Balls
33
33
33
33
33
Nutrition
Per Each
119
8
10
3
7

In-Process Photos
Ingredients
 
Before Processing
 
Ready for the Cinnamon